Installing the CP Library plugin.
You can install the CP Library plugin just like any other WordPress plugin.
- Download the plugin from https://churchplugins.com/products/cp-library
- Install the zip file via the WordPress plugin manager
- Activate the plugin
Find and Activate Your License Key
Your license key can be found in your ChurchPlugins account. Copy the key, and go to the WordPress Admin area of your site. If you have installed and activated the plugin, a menu item called “Series” will be in the sidebar. In the Series submenu, click on settings.
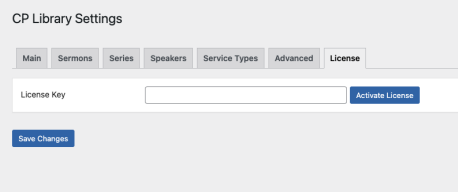
This is the area where you can assign global settings to the plugin. It may look slightly different than below when first installing the plugin. Go to the tab that says License and paste your key in the provided text field.
Basic Usage
There are four main components of the CP Library plugin: Series, Messages, Speakers, and Service Types.
Series
A Series is a way to group related Messages based on topic, scripture, season, or other data. To create a new Series, click on the Series tab in the left-hand navigation area in your WordPress dashboard.
Click on the Add New sub-menu item to create a new Series. You will see several configuration boxes on the page. You can classify the Series with scriptures or seasons, and you can also add Messages (which are covered in another section.) Don’t worry about adding these things for now, just give your first Series a title and a featured image and click “Publish”. When finished, click the preview button and you will be taken to a page that displays the Series.
Messages
Back in your WordPress dashboard, it’s time to create your first Message. To do so, go to the Series tab in the Admin sidebar. Navigate to the “Messages” option in the submenu, and add a Message by clicking the “Add new” button at the top of the page.

Once again, you will be presented with quite a few configuration options. Give the new Message a title and assign it to the Series you just created. When you have published it, visit the /Messages path of your website. You will see an interface that allows you to filter through the existing Messages. Notice that in the Messages view, there is an option to switch to Series. When clicked, you can view any Series that you have created.
If you want to quickly add Messages when creating a Series, this can also be done directly inside the Series view. There is a content box called Messages where you can create Messages to be assigned to the current Series.
Adding scriptures
When specifying the scripture used in a message, taxonomy terms are automatically applied to the message making it possible to filter messages based on that scripture on the archive page. To add a passage, type the name of the book the passage is in. Suggestions will appear in a dropdown, and when selected you will guided to choose the chapter and verses.
Adding topics
CP Library has a large list of predefined topics, making it easy to maintain consistency across similar messages by having options to choose from instead of trying to classify the topic on the spot. This also makes for better filtering on the archive page. When you begin typing a topic, suggestions will appear below which can be selected.
Media URLs and Embeds
You can specify urls for audio and video files when creating or editing a sermon, these will be used in a media player on the sermon page or anywhere there is a list of sermons. You can also input HTML for an embed if you would like that to be used by the media player. For example, the platform Sermon Audio allows you to customize and copy the code for embeds to be used on your site. Here’s an example of an embed editor. https://embed.sermonaudio.com/embed-editor/sermon/101022456502493/?pop=true
Speakers
You can keep track of the various Speakers with this data type. Any Speakers created can easily be assigned to Messages or Series.
Service Types
Service Types are disabled by default but can be enabled in the Advanced tab in settings. They can be used to classify the type of service, e.g. morning service or evening service. Once they are enabled, you can add that information to a Message.
Settings
Several global settings can be applied to the plugin. They are located in the Settings option of the Series menu item. Here you can change the names of any of the content types (e.g. use “Sermons” instead of the default “Messages”) as well as customize the theme color and thumbnails of Messages.
Importing and exporting
Importing
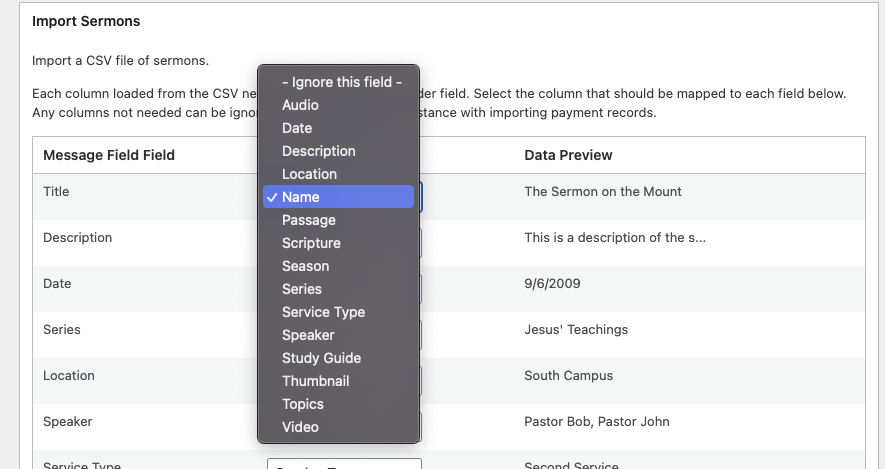
If you have a large number of sermons you would like to import, you can use the CSV importing tool to populate sermons to your database. Go to the tools sub-menu item and click on the import/export tab. When you upload a CSV file, you will need to map the column names of the file to the associated columns in the table used by CP Library. For example, if in the CSV file, the sermon title is called “Name”, you will need to specify that the importer set the sermon title to the value coming from Name. If a column name matches the name of a column name in the uploaded file, it will automatically use that value.
If you have sermons you would like to migrate from another site, you can export them as CSV using a tool such as WP All Import. For an XML file, you can convert it to CSV using a tool like Convert CSV.
Exporting
You also have an option to export your sermons as a CSV. This is useful when migrating your sermons to a new website easily, or just to download the data for other applications. There is a button below the importing tool on the tools page which exports everything with a single click.
Integration with CP Locations
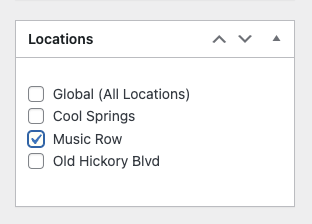
If you are using the CP Locations plugin, you will have extra configuration options for Messages and Speakers, which are found in CP Library. When a location is specified for a Message, you can search for Messages in the context of that location. For example, any Messages with Music Row as their location can be searched for at /music-row/messages. Only messages from that location will appear in the search results.
Using Shortcodes
If you are using a page builder such as Elementor or Gutenberg and want to embed parts of the plugin such as filters, CP Library provides a number of shortcodes.
cpl_item
Displays a single item, if it exists.
Usage
[cpl_item id='1234' player='true' details='true' service-type='evening-service']Options
- id: if you specify the ID of a message, that will be displayed. Otherwise, the most recent message will be displayed.
- player: If the message has linked video or audio, display a button that starts a persistent player.
- details: Whether or not to display additional information about the message, such as the title and which series it belongs to.
- location: Only works if you are also using the CP Locations plugin. Limits results to that location.
- service-type: If you have enabled service types, you can limit results to the specified type.
- template: Use
template='alt'for an alternative layout.
cpl_root
Displays a searchable and filterable list of messages.
Usage
[cpl_root]
cpl_item_widget
Displays the date, title and audio/video playback buttons of the latest message.
Usage
[cpl_item_widget]
cpl_item_list
Displays a list of messages
Usage
[cpl_item_list]
cpl_video_widget
Displays the thumbnail of the latest message that has an attached video.
Usage
[cpl_video_widget]
Analytics
Introduced in version 1.2.0, CP Library now tracks analytics on your sermons, such as view duration, user engagement, and view counts. You can find the analytics dashboard page in the CP Library submenu.
Podcast feeds
CP Library provides custom RSS feeds for the various post types it provides. You can use these feeds to automatically publish podcasts on platforms such as iTunes when you publish a sermon on your site.
By default, podcast feeds are disabled. To enable them, go to Settings -> Advanced and click on the Enable Podcast Feed option. Another tab will appear called Podcast; this tab has a variety of settings you can apply to your feed.
To get a feed for a list of sermons, simply add /feed/podcast to the end of any URL that displays a list of sermons. For example, when viewing a single series, your URL will look something like this: https://my-church.com/series/example-series. To get the CP Library feed just modify the URL to have this structure: https://my-church.com/series/example-series/feed/podcast. The content you will see is an XML file containing the feed information, which podcasting platforms can use to pull the latest information from your site. Here’s a guide on how to set up a feed for Apple Podcasts.
Example URLs you can load a feed from
Here are some examples of the various RSS feed URLs available. Take note that the actual URLs will look different depending on your sermon configuration and the site URL.
For the main sermon feed
https://my-church.com/messages/feed/podcast
For a specific topic
https://my-church.com/topics/creation/feed/podcast
For a service type
https://my-church.com/service-types/evening-service/feed/podcast
A single series
https://my-church.com/series/example-series/feed/podcast
Advanced Settings
On the main settings page for CP Library, there is an advanced tab which allows you to enable and disable post types. Disabling one or more of these cuts down on complexity if you don’t need all of the possible options when creating sermons.
Default menu item
This setting allows you to specify which post type will be the main one in the WordPress admin sidebar. Whichever one is specified will be the name of the sidebar item.